Campaign Settings
Think of the Campaign Settings screen as your “Main Settings” and “Preferences” screen for your campaign on Reach. Fill out all the fields you can and make sure you click “Save”. You can come back here at any time to make changes.
Renaming your campaign
You can tap the “Rename” button next to your campaign name to provide a new name for the campaign in Reach. It will be changed everywhere it appears in the app.
Public Directory and Landing Page
This is where you will fill out the details that will be displayed for your Reach campaign in the Reach Campaign Directory. This is a public listing of all active campaigns. Your campaign will have its own customizable landing page where new users can learn about the campaign, join, donate, email you, and more.
Filling out the directory is a very important step – any campaign which is not published will only be visible and usable by admins and owners. Once you’ve filled in all of your campaign information (detailed below), be sure to click the “Publish Now” button in the top right to start onboarding users.
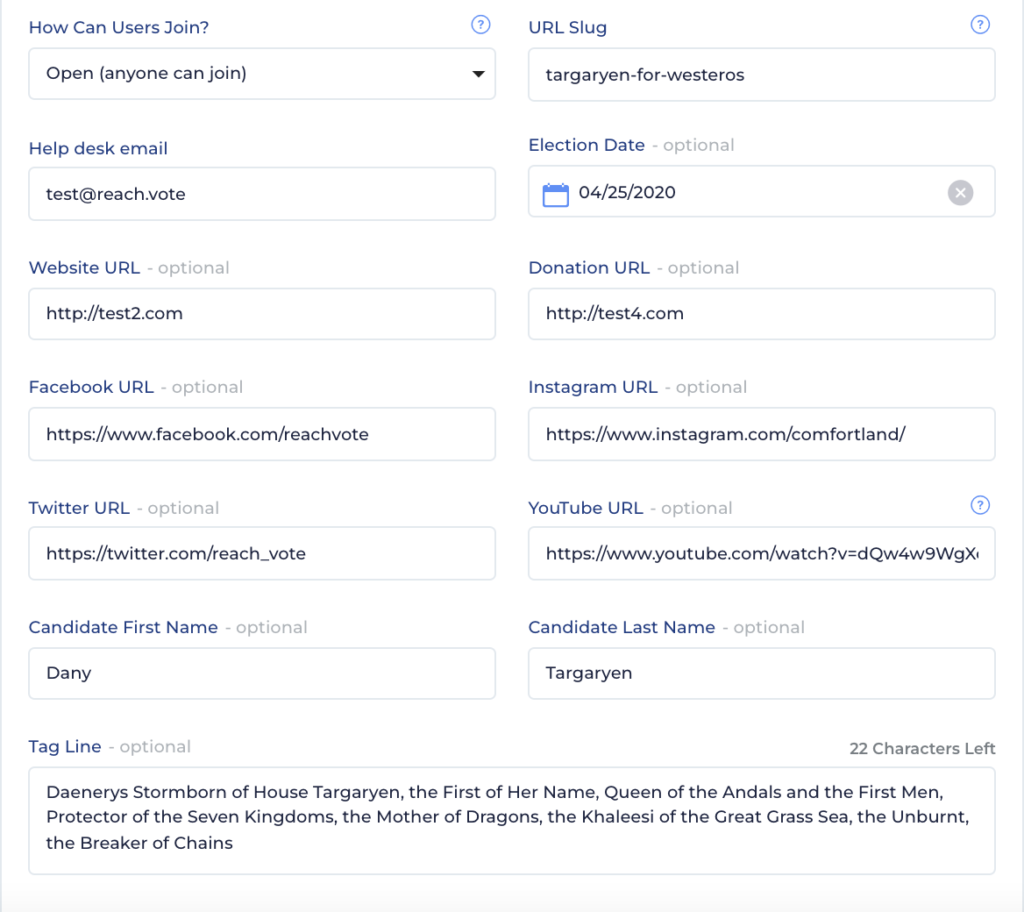
- How Can Users Join?: This is an important setting which controls how users can join your campaign from your directory listing. There are 3 choices:
- Open: Anyone can join by using the “Join” button
- Locked: Requires a 6 digit campaign key
- Closed: Nobody can join via the directory and must be invited by phone number
- Reach URL Slug: Every Reach campaign has a unique URL “slug” which is added to the end of all your Reach links to identify which campaign the links is meant for. Your slug is automatically generated when we first build your campaign. You can change it here any time you want but do keep in mind that if you’ve already shared any links to your campaign with anyone, if you change your slug, those links will not be able to redirect to your campaign properly.
- Help Desk Email: This is how your users, or anyone viewing your Campaign Directory, can contact you from the app if they have any organization-specific questions. We may also direct users to this email address if they contact us with questions that are best addressed to you.
- Election Date: Displays on your Campaign’s card on the user’s My Campaigns drawer.
- Website URL: Linked on your Campaign’s card on the user’s My Campaigns drawer.
- Donation URL: Linked from the Campaign Actions menu from the Campaign’s card in the user’s My Campaigns drawer.
- Facebook URL
- Instagram URL
- Twitter URL
- YouTube URL
- Candidate First and Last Name: If you’re running an electoral campaign, fill in your candidate info here.
- Tag Line: A one sentence summary of your organization or campaign to let users know who you are and why you’re organizing.
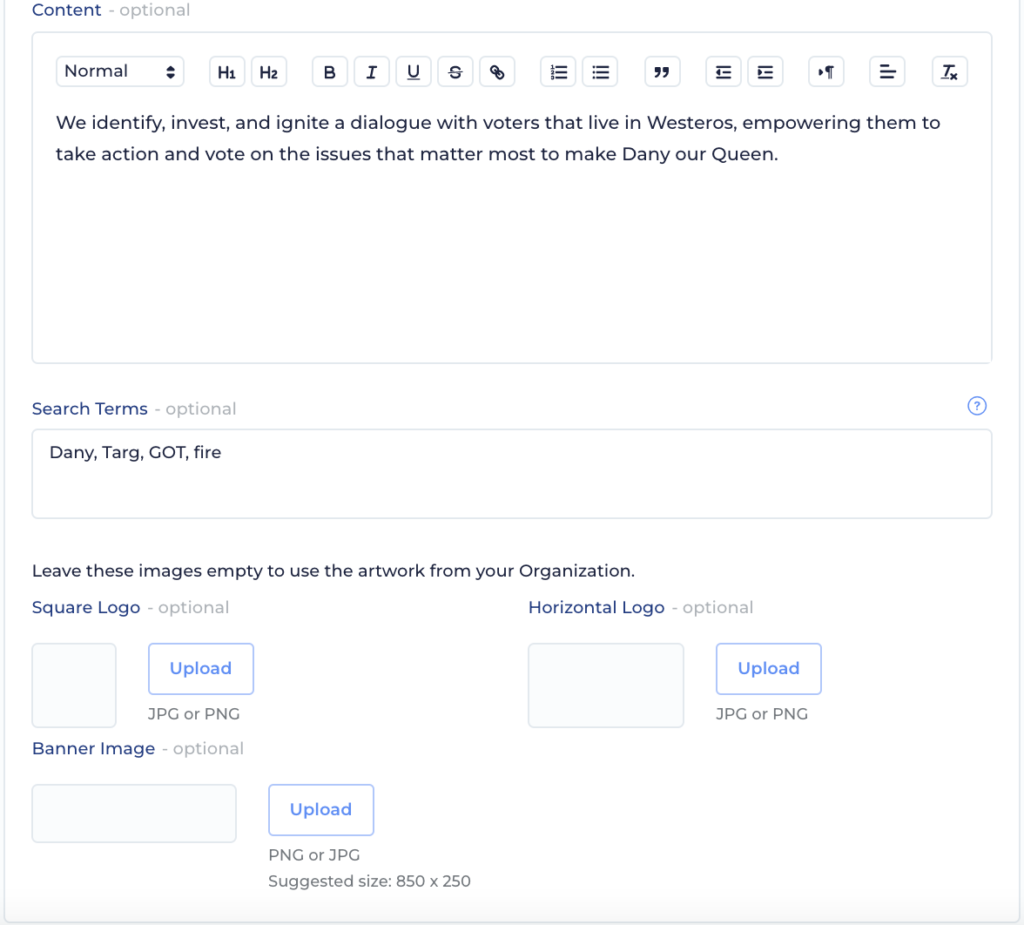
- Content: It’s your place to shine! Talk about your organizing goals, give a summary of why your work is important, and get those volunteers flowing in!
- Search Terms: Specify terms beyond the name of your organization, campaign, and candidate to help users find you in the campaign directory. Add as many terms as you want, separated by commas. Hint: Try common abbreviations.
Feature Settings
Inviting Users
You can decide here which users on your campaign (if any) can invite other user by phone number.
Adding People
When a user can’t find the person they’re looking for in your data set, they can add them as a brand new person record in Reach. All added people will be tagged with your “Reach Add” tag and available in your exports. Turn this off if you’d prefer to restrict users to only reach and interact with people they can find in your data set. You can also turn off the ability to add new people from the Contact Import process while leaving it on from the Search Results screen. Learn more about adding people here.
Voter Registration Pipelines
Voter Registration pipelines allow your users to register any Reach Add as a new voter using any method available in their state, track their progress, and send chasers for distributed, scalable voter registration. Choose which voter registration methods you want to make available in the app. Learn more about Voter Registration here.
Home Screen & Action Cards
Your Home Screen is your action feed for your campaign volunteers – learn more about setting up Action Cards for your home screen here. You can choose to show or hide your Home Screen here. You can also decide which tab on your Home Screen should be the default tab users arrive at when they switch to your campaign.
Content Library
The Reach Content Library is a tab on the Home Screen. It allows you to curate and organize a library of content which your users can browse, provide feedback on, and share on social media. Turn this whole tab and feature on or off. You can learn more about the Content Library here. You can also use this section to decide which users can upload content for your approval via the My Uploads screen, choose a default gallery for user-generated content, and add a legal disclaimer that users will see on the screen before uploading content.
Events
The Events tab on the Home screen allows you to show events from Mobilize to your Reach users right in the app. They can tap into events to RSVP or share events from Reach. Learn more about the Mobilize integration here.
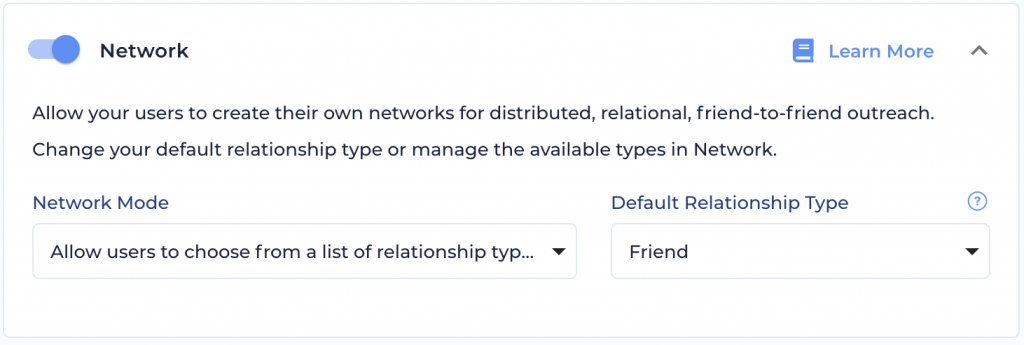
Network
The Network feature allows your users to import their personal contacts and match them to your organization’s data. Learn more about the user-facing Network screen here. You can choose how you want the Network feature to work for your campaign. You can turn it off entirely, or set it to one of the following modes:
- Allow users to choose from a list of relationship types: In this mode, every time a user adds someone to their Network, they will be prompted to pick from the list of pre populated Reach relationship types:
- Acquaintance
- Classmate
- Coworker
- Faith Community
- Family
- Fellow Member
- Fellow Organizer
- Friend
- Friend of Friend
- Met while organizing
- Neighbor
- Other
- Recruit
- Self
- Significant Other
- Social Groups
- Social Media Follower
- Automatically apply a default relationship type: In this mode, the default type you have set will be applied every time a user adds someone to their network. This will save the user some time and make things simpler, but it will give you less data on the nature of the relationships you’re mapping.
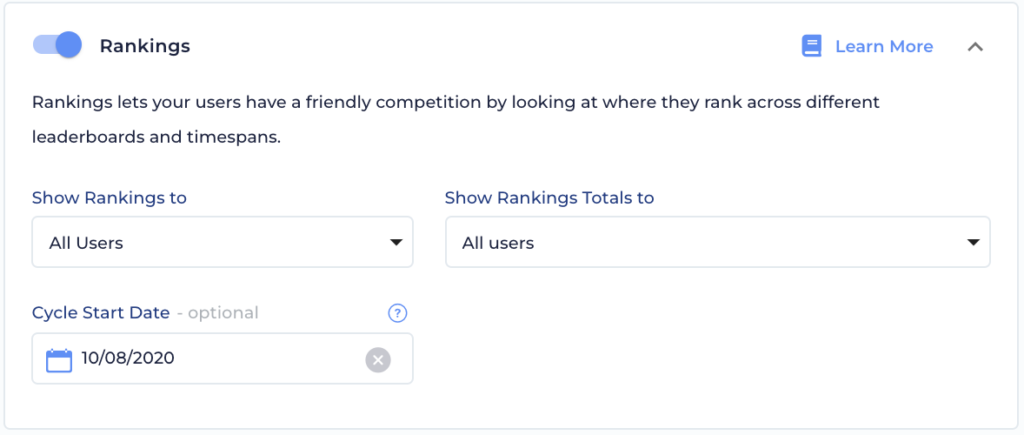
Rankings
Choose whether the Rankings tab is visible in the app, and select which users should be able to see the leaderboard as well as Campaign Totals. If you’ve been using Reach for more than one election cycle, you can add a “Cycle Start Date”, which determines how we calculate “This Cycle” rankings. If you’ve only been using Reach for one cycle, you can leave this blank and that option will not be available in Rankings at all.
Chat
You can turn on or off your in-app Chat channel entirely, or disable the full Team Chat channel while still keeping the Chat function live for User Groups and DMs (more about Chat here). You can also set your full-campaign chat channel to announcement-only mode so only moderators can post messages in it, and you can optionally override the name of that full-campaign channel.
User group chats can also be in announcement-only mode which you can configure on the User Groups admin screen.

Other Settings
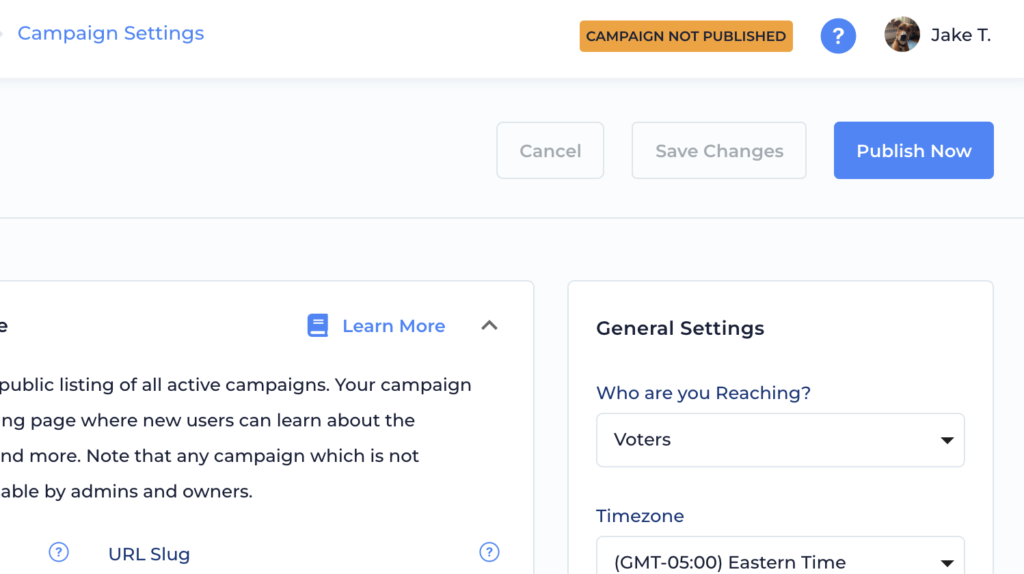
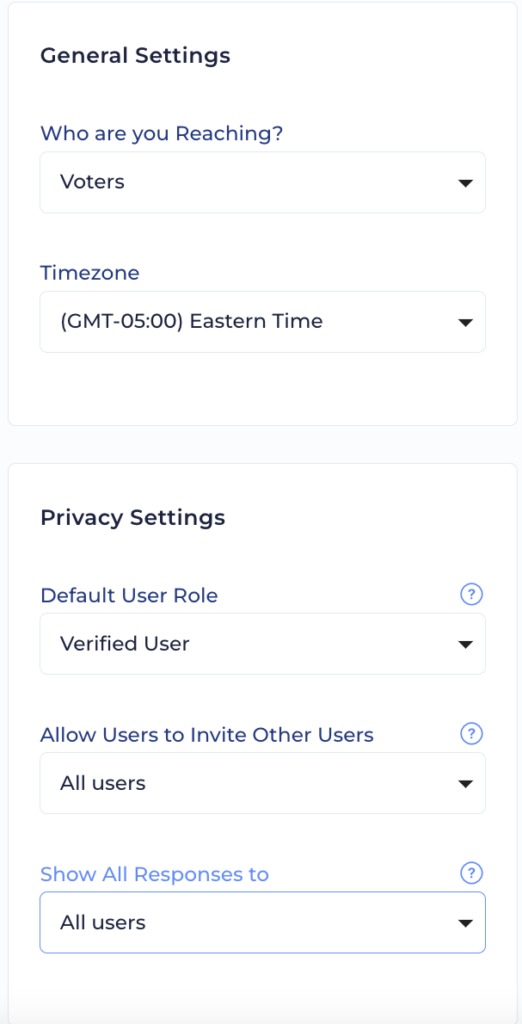
General Settings
- Who are you Reaching: Update the vocabulary in Reach to refer to “Voters”, “People”, or “Members”, depending on the kind of work you’re doing.
- Time Zone: Determines the time zones used in your exports.
Privacy Settings
Here, you can can choose a Default User Role so that anyone who joins your campaign will join with certain permission levels. You can also opt to hide the Invite User feature, survey responses, full addresses, and full contact info from users based on their permission level.


